Easy Overnight Sourdough Bagels (Soft Inside, Chewy Crust)
Last Updated on January 15, 2026 by Stephanie Gilpin
These sourdough bagels are the result of many test batches, tweaks, notes scribbled on scraps of paper, and mornings where I thought, “These are pretty good… but not there yet.”
And then finally — these bagels. Sigh. This. Is. IT!
They have a perfectly soft, fluffy interior, a chewy golden crust, and that classic bagel bite that only comes from boiling before baking. They’re easy, reliable, and designed for an overnight rise so they fit naturally into real life.
No complicated steps. No stress. Just really, really good sourdough bagels.
This is hands-down the best sourdough bagel recipe I’ve ever made, and it’s the one I keep coming back to.
Why You’ll Love This Recipe
- Overnight rise – mix the dough, go to bed, bake in the morning
- Soft interior + chewy exterior – exactly what a bagel should be
- Beginner-friendly – no complicated shaping or timing
- Flexible hydration – works with thicker or thinner starters
- Perfect for freezer meal prep – especially for breakfast sandwiches
Are Bagels a Good Beginner Sourdough Recipe?
Yes. Absolutely yes.
Bagels are one of my favorite sourdough recipes for beginners because:
- The dough is forgiving
- You don’t need stretch-and-folds
- You don’t need perfect shaping skills
- The boil gives you a safety net for structure
If your starter is active and bubbly, you can make bagels. End of story!
Ingredients
- ½ cup active sourdough starter
- 1¼–1½ cups warm water
(Start with 1¼ cups and add more only if needed) - 4 cups bread flour
- 1½ teaspoons salt
- 1 tablespoon sugar or honey
- 1 tablespoon olive oil
For boiling:
- Water
- 1 tablespoon baking soda
Optional toppings:
Everything bagel seasoning, sesame seeds, poppy seeds, coarse salt, etc.
How to Make Sourdough Bagels
1. Mix the Dough
Add all ingredients to the bowl of a stand mixer.
Start with 1¼ cups of water and mix on low. Knead for 8–10 minutes, until the dough is:
- Smooth and shiny
- Elastic
- Soft but not sticky
You may need to add a little more water depending on how thick or thin your starter is. Go slowly — a well-hydrated dough is the goal, not a sopping wet one.
2. Overnight Rise
Transfer the dough to a lightly oiled bowl.
Drizzle about 1 teaspoon of olive oil over the top of the dough and gently rub it across the surface. This keeps the dough from drying out overnight.
Cover and let rise at room temperature for 8–12 hours, or until doubled and puffy.
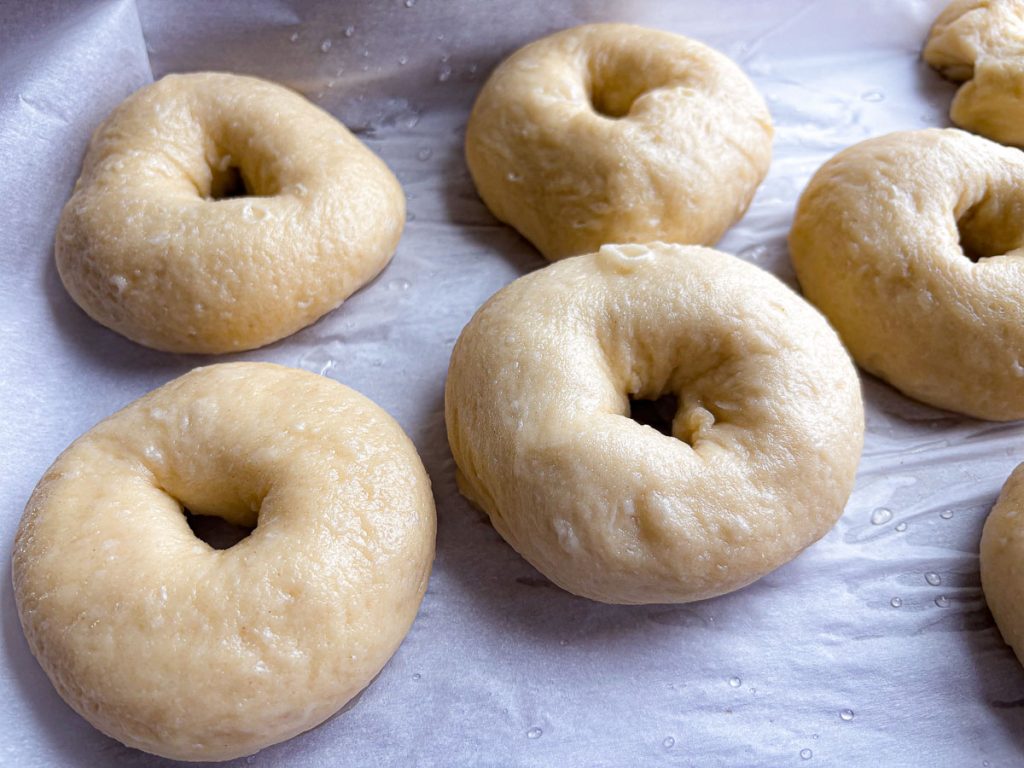
3. Shape the Bagels
Turn the dough out onto the counter and divide into 8 equal pieces.
Roll each piece into a smooth ball. Then, using your thumb and pointer finger, poke a hole through the center and gently stretch to form a bagel shape.
Set aside while you prepare the boiling water.
4. Boil the Bagels
Preheat your oven to 450°F.
Bring a large pot of water to a rolling boil. Add 1 tablespoon baking soda.
Working a few at a time, gently add the bagels to the water. They should float within 20 seconds.
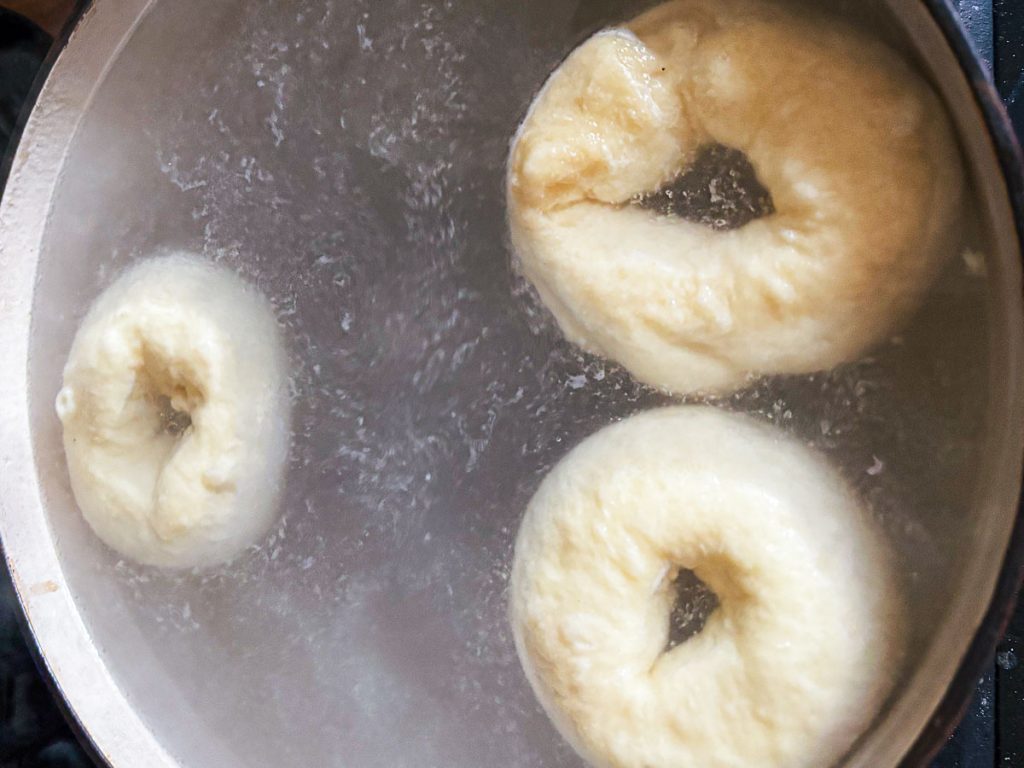
Boil for:
- 30 seconds on the first side
- Flip
- 30 seconds on the second side
If a bagel sinks briefly, gently nudge it — well-proofed dough usually floats on its own.
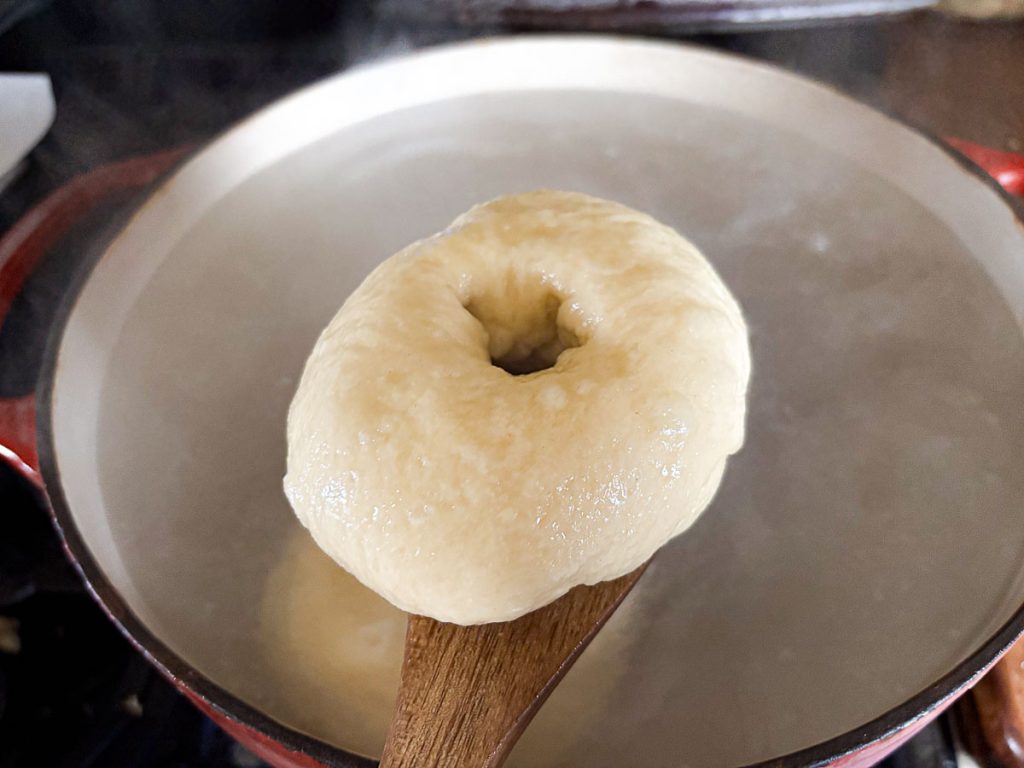
Remove to a parchment-lined baking sheet.
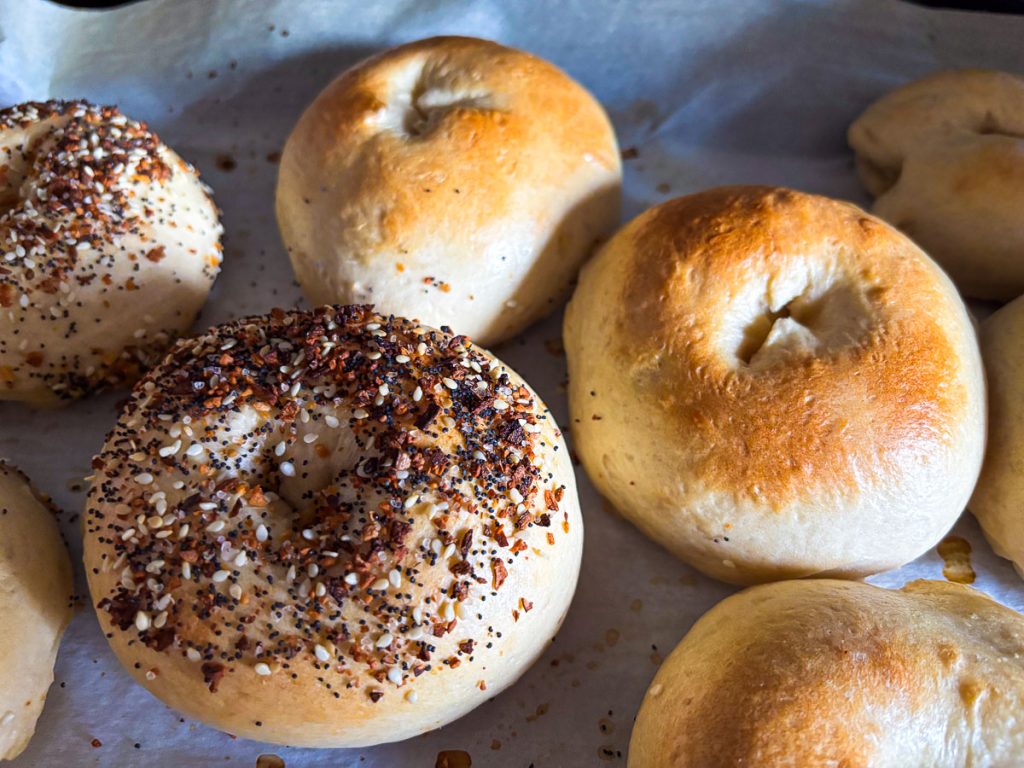
5. Add Toppings (Optional)
If using toppings, dip the wet, boiled bagels into your toppings on a plate, then return them to the baking sheet.
This method coats them evenly without making a mess.

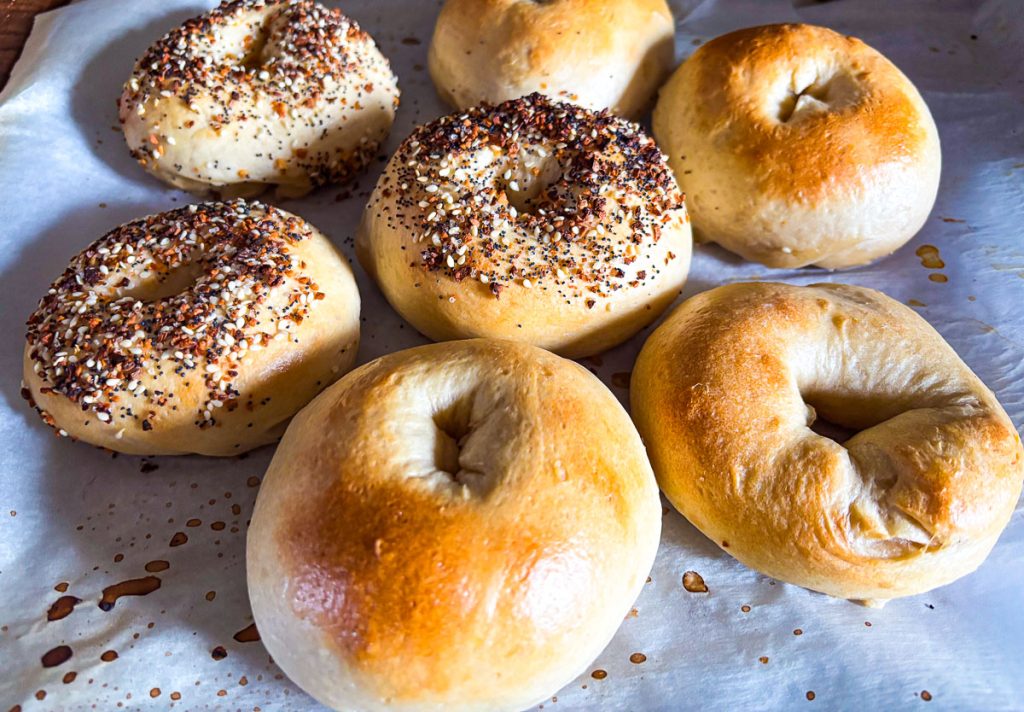
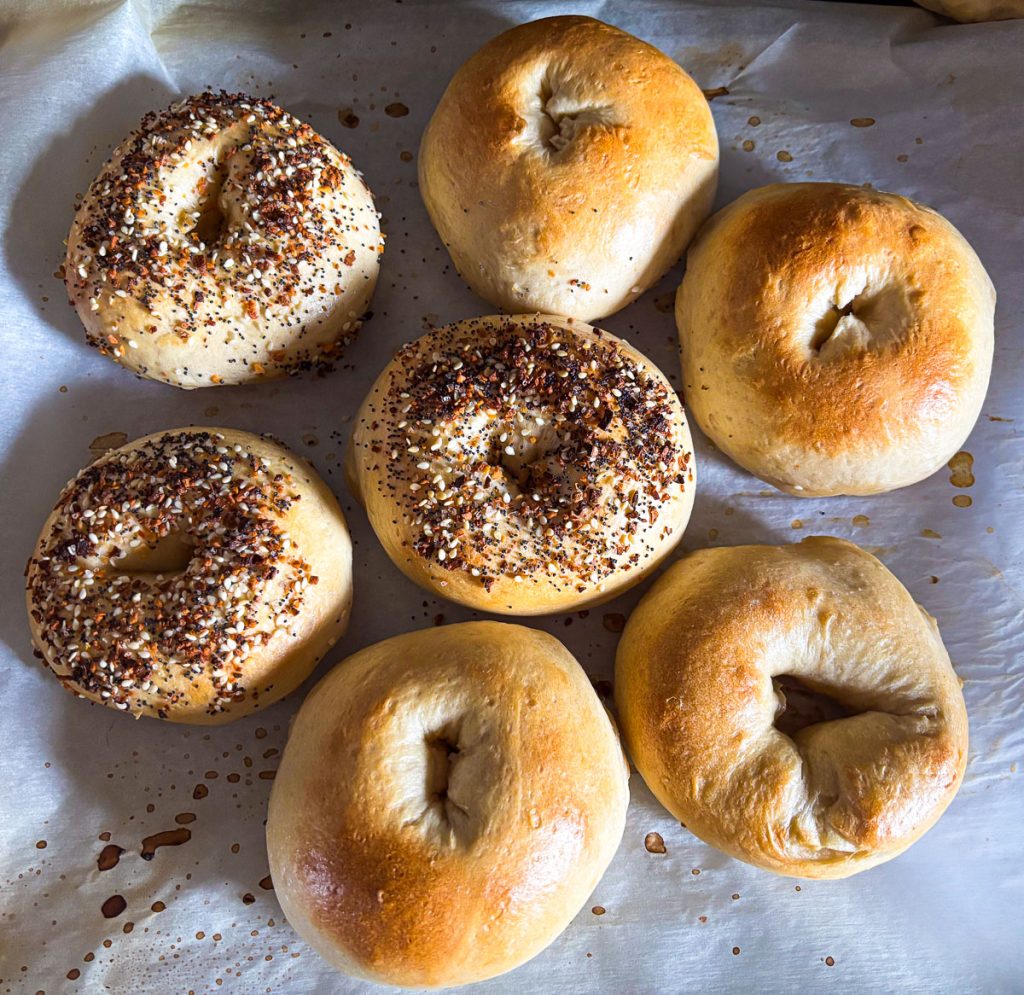
6. Bake
Bake at 450°F for 18–22 minutes, until golden brown.
Bagels are done when:
- The exterior is deeply golden
- Internal temperature reaches 190–200°F
7. Cool Completely (Really, really Important!)
Let the bagels cool completely before slicing.
Cutting too soon can cause a gummy interior, even if they look done. This step matters — trust me, they are worth the wait!
Why Do You Boil Bagels in Baking Soda Water?
Boiling bagels:
- Sets the crust
- Creates that signature chewy exterior
- Helps the bagels hold their shape
The baking soda raises the pH of the water, which encourages better browning and gives bagels their classic texture.
This step is non-negotiable — it’s what makes a bagel a bagel.
Baker’s Schedule (Overnight Method)
Evening
- Mix and knead dough
- Cover and let rise overnight (8–12 hours)
Morning
- Shape bagels
- Boil
- Bake
- Cool and enjoy
Example Baking Schedule:
8pm: Mix Dough, cover and let sit overnight.
8am: Shape the dough into bagels, boil and bake them. Enjoy!
Adding Inclusions (Sweet or Savory)
One of my favorite things about this recipe is how easily it adapts.
Add inclusions right before shaping, after the overnight rise.
Some favorites in our house:
- Cheddar + jalapeño
- Cheddar + Anaheim peppers
(Even my toddler loves these — Anaheim peppers are much milder!) - Cranberry jalapeño using frozen whole cranberries
Other ideas:
- Blueberries
- Raisins
- Sundried tomatoes + basil
- Any cheese
- Sweet or savory combinations
Gently knead inclusions into each portion, then shape as usual.
How to Eat Sourdough Bagels
- Plain, fresh from the oven with butter
- Toasted with cream cheese
- Breakfast sandwiches (egg, cheese, sausage)
- Lunch sandwiches
- Freezer breakfast prep
I love turning these into make-ahead bagel sandwiches and freezing them for easy grab-and-go breakfasts for my husband.
I also use this same recipe to make “bagel bites” or mini bagels. Perfect for snack freezer prep- hello sourdough pizza bagel bites!
Storage & Freezing
- Store at room temperature for 2–3 days
- Freeze sliced bagels in an airtight bag for up to 3 months
- Reheat straight from frozen in the toaster
Frequently Asked Questions
Can I use sourdough discard?
Recently fed discard can work, but the starter still needs to be strong and active. I don’t recommend using discard from a brand-new starter or discard that has gone unfed for several days.
Why are my bagels dense?
Most often this means:
- Starter wasn’t active enough
- Dough needed more hydration
- Dough didn’t fully rise overnight
Can I ferment longer than 12 hours?
Yes — sourdough is flexible. As long as the dough still feels strong and not overly slack, it should bake up just fine. Also, you can pop the dough in the fridge after a couple hours on the counter for a longer ferment in the fridge.
Why are my bagels gummy inside?
They were likely cut too soon. Let them cool completely before slicing.
Final Notes:
These bagels are the result of real kitchen testing, not theory — and they’re the recipe I make again and again because they work.
If you’ve been looking for an easy, reliable sourdough bagel recipe with a soft interior, chewy crust, and flexible timing, this is the one.
Printable Recipe Card:

Sourdough Bagels (Easy Overnight Rise)
Ingredients
Bagel Dough Ingredients:
- 1/2 cup active sourdough starter
- 1 1/4 – 1 1/2 cups warm water start with 1 1/4 cups, add more only if needed
- 4 cups bread flour
- 1 1/2 teaspoons salt
- 1 tablespoon sugar or honey
- 1 tablespoon olive oil
For Boiling Bagels:
- Water
- 1 tablespoon baking soda
Instructions
- Mix the Dough:
- Add the active sourdough starter, warm water, bread flour, salt, sugar or honey, and olive oil to the bowl of a stand mixer. Begin mixing on low speed. Start with 1 1/4 cups water and add more only if the dough seems dry—your starter’s thickness will affect how much water you need.
- Knead:
- Knead for 8–10 minutes, or until the dough becomes smooth, shiny, and elastic. It should feel soft and well-hydrated, but not sticky.
- First Rise (Overnight):
- Transfer the dough to a lightly oiled bowl. Drizzle about 1 teaspoon of olive oil over the top and gently rub it across the surface to prevent drying.
- Cover the bowl and let the dough rise at room temperature for 8–12 hours, or until doubled and puffy.
- Shape the Bagels:
- Turn the dough out onto a clean counter and divide into 8 equal pieces. Roll each piece into a smooth ball.
- Using your thumb and pointer finger, poke a hole through the center of each ball and gently stretch to create a bagel shape.
- Preheat the Oven:
- Preheat your oven to 450°F (232°C). Line a baking sheet with parchment paper.
- Boil the Bagels:
- Bring a large pot of water to a rolling boil. Add 1 tablespoon baking soda.
- Gently place 2–3 bagels into the boiling water at a time. They should float within 20 seconds.
- Boil for 30 seconds per side. If a bagel sinks, gently nudge it to help it float.
- Transfer boiled bagels to the parchment-lined baking sheet.
- Add Toppings (Optional):
- While the bagels are still wet, dip the tops into your desired toppings or sprinkle them on.
- Bake:
- Bake for 18–22 minutes, or until golden brown and the internal temperature reaches 190–200°F (check for accuracy).
- Cool completely before slicing—cutting too soon can cause a gummy interior.
Notes
• Hydration Tip: Start with the lower amount of water and increase only as needed. A well-hydrated dough gives a softer crumb and better rise.
• Proofing: If your dough takes longer than 12 hours to double, it’s likely due to room temperature or starter strength. Longer fermentation is fine as long as the dough still feels strong and elastic.
• Storage: Store bagels in an airtight container for 2–3 days. Freeze sliced bagels in a freezer bag for up to 3 months.
• Serving Ideas: Eat plain, toast with cream cheese, or use for breakfast sandwiches and lunch sandwiches. These also make excellent freezer meal-prep bagel sandwiches.
• Inclusions: Add mix-ins (cheddar + jalapeño, blueberries, sundried tomatoes, cranberries, etc.) right before shaping after the overnight rise.
• Why Boil Bagels: Boiling in baking soda water sets the crust and creates the classic chewy texture.


I have made these several times, and my family love them. I am more successful if I set them out longer than the 1 hour after being in the fridge.
Thank you for letting me know! I will add a note about that to the recipe.